Showing posts with label wardrobe sewing. Show all posts

Thursday, October 30, 2008

Fall Mini-Wardrobe

Orange you glad it's fall:

I promised you a mini-wardrobe using these great fabrics:


Well, here it is. (In bits and pieces.)


Dress (Butterick 5259) + Turtleneck (Vogue 7799)


Turtleneck + Black Pants (Butterick 5259)

Great Orange Coat (Vogue 1068)


Plus, I could do:

Black Pants + Orange Coat

Dress alone

Dress + Orange Coat

I'll be adding or updating reviews on PR this morning. As for old posts, these links take you to the coat, the lining, and the typo in the pattern.

Monday, October 20, 2008

Here's a sneak peek...

In the midst of school carnivals, volunteering, teaching swimming, Halloween crafting and slumber party planning, I've finished a 4-piece mini wardrobe for myself. I'm very excited. I'll be taking the posting the pictures soon, but here's your sneak peek...

Saturday, August 30, 2008

My Man in Blue

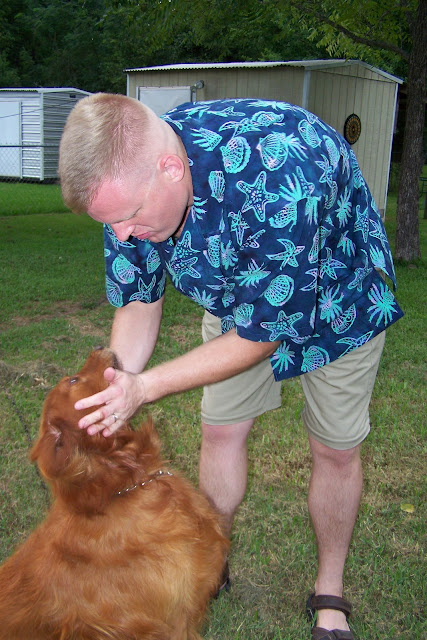
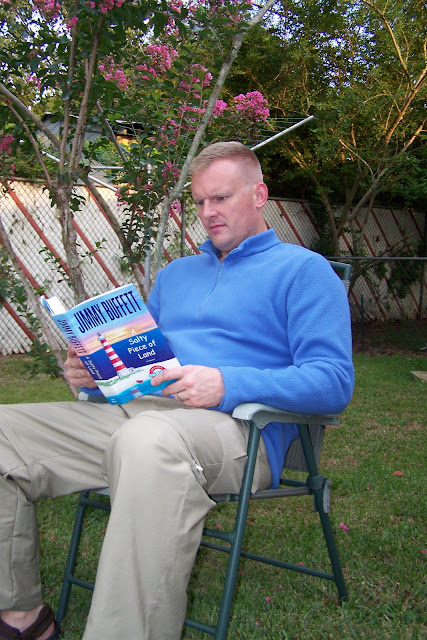
Here's my mini-wardrobe entry for PR. I've called it "My Man in Blue", even though my man in blue wears a brown uniform most of the time. (Local sheriff's office, not those delivery guys.) Anyway, I think he looks nice in blue, so I've created him a fun weekend wardrobe. (Besides, he wouldn't let me do a purple and gold wardrobe--darn Arkansan!)

The requirements were 4 pieces, 3 colors, 4 outfits. Here are the outfits:

McCalls 4518 unbuttoned over McCalls 5282 with Jalie 977 Pants

McCalls 5282 with Jalie 977 Pants (Unzipped to shorts)

McCalls 4518 with Jalie 977 Pants (unzipped to shorts)
KwikSew 3570 with Jalie 977 pants

Wednesday, August 20, 2008

A little sewing...

I've gotten a few personal pieces (as opposed to jon-jons and jumpers) finished over the last few weeks.


KWIK SEW 3570
This is part of the mini-wardrobe I've got planned for the August PR Mini-Wardrobe Contest. He still has 2 shirts and pants coming. Maybe.

I really like this shirt. I did have trouble figuring out which size to make. Come to find (figure) out, the finished garment measurements that are printed on the pattern tissue are incorrect. It was very easy to put together. The wrap-around side seams are great.

As for the pattern: the instructions were wonderful. Just reading them, the zipper installation made no sense, but I followed them anyway. The instructions worked perfectly! I'm thinking of trying this again in a few months with a heavier jersey knit. My review is here.


Vogue 7799


I'm really beginning to love most Vogue patterns, this one included. I was first attracted to the long, lean look of this top.

This is actually my muslin, but is a quite wearable one. I made my usual adjustments (FBA, sloping shoulders, rounded shoulders). I also used my serger for most of the seams, though, oddly enough, the instructions included no mention of that. I also used a double needle for the hems of the top and armholes. I do think the neck is a little long. (It's folded down again in this pic.) The PR Review is here.

Vogue 8392


This is my back-to-school sewing. (Not the "wearing back to school" kind, but the "hurray, the kids are back in school and I can sew" kind.) I love this top.

I've made view A before. This is view B. I must admit the tiger print is a first for me. I have never worn an animal print before. But, I love this top. (Did I say that already?) It was very easy to make. The instructions are easy to follow. I made a FBA by just increasing the side seams, tapering from armhole out 1/2 inch and back in at waist. I adjusted for rounded shoulders.

Tuesday, July 22, 2008

New Mini-Wardrobe Contest

PR's next Mini-Wardrobe Contest starts August 1! I've been thinking about my entry for a while, but I thought it started in October. I'm not ready!!!!!

That said, here are the rules:

  1. 4 pieces, 3 of which must be different types of garments
  2. 3 different colors in the wardrobe
  3. they must combine to make -4 distinct, different outfits

Ugh! That's exactly what I did in May--and others did not! (Yes, I'm whining. Now I'm done.)

Anyway, now it's almost August and I need to get in gear. I had been thinking about using this contest as a way to expand the hubby's closet. I'm leaning toward:
  1. A pair of casual pants
  2. A long-sleeve button-up shirt
  3. A short-sleeve tee shirt
  4. A fleece pull-over

I think that adds up to:
  1. Pants + button-up
  2. Pants + tee shirt
  3. Pants + tee shirt + unbuttoned button-up
  4. Pants + fleece pull-over

I just need to confirm that the different shirts will count as different types of garments and choose some patterns and fabrics.

Tuesday, July 8, 2008

My Fall Sewing Inspiration

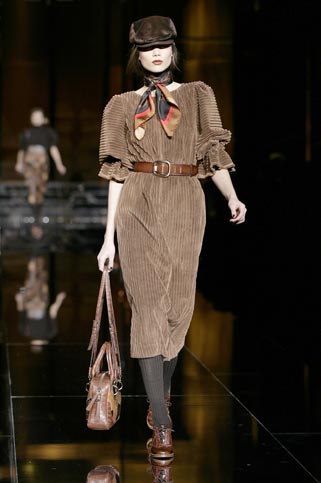
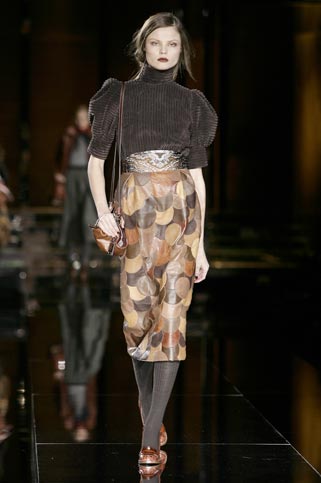
I've been browsing. Here are a two pieces that could translate into something perfect for this fall...


From the runway:


I like the sleeves. I like the belt. I like the cord. I wonder if this pattern would work.


I like this top. I like the sleeves. I like the texture. I like the idea of pairing it with a Hollywood waist.


Both of these are from this designer. I'm hoping to have a fall plan soon. I'll post when I do.

Saturday, May 31, 2008

My Mini-Wardrobe Contest Entry

Well, I've done it! I'm finished. And just in the nick of time. Top 10 things I learned (or was reminded of that I already knew):

10. Try a new pattern--it's fun!
9. How to put a pocket in my favorite pants.
8. Ribbon is a creative cover-up.
7. If you are going to sew with a plan, work with the plan
until you find something you like. Don't settle.
6. How to make a round shoulder adjustment.
5. A great reference is invaluable! Watch for a review this Monday.
4. Altering for the shoulder slope will keep arm holes from gaping.
3. I can make a pair of pants in 63 minutes!!! (with a pocket)
2. Plans can change!
and my huge #1...If you wouldn't buy it in the store, don't make it!!!!!


Simplicity 3631 made a great jumper. Here's what I did:
  1. I made my lining as my muslin.

  2. I altered my pattern pieces.

  3. I made up the lining/muslin bodice according to my newly altered patterns. I also used the skirt pieces and basted the skirt onto my lining/muslin, just to be sure.

  4. I found that my armholes gaped and that the waist was indeed too long.

  5. Folded out an inch of length just above the waist. You can see this in the image to the left.

  6. I made a sloped shoulder adjustment per page 48 in my book.

  7. This fit nicely, so I took the whole thing apart, adjusted my tissue pattern again, and cut my garment.

  8. I put the garment together following the instructions, which I found quite easy to follow.

  9. I ventured from the instructions in step number 13 where it appears they treated the lining and garment as one during the installation process. This gave me very poor results, so I ripped it out and inserted the zipper into the garment only. Then I folded under the lining and tacked it in place. Just FYI, I have been using the lapped zipper technique published in the December 2007/January 2008 Threads magazine with great success. (Upper left image.)

  10. I finished the garment as instructed.

  11. I added bra strap carriers in the same ribbon used throughout my mini-wardrobe pieces.

Simplicity 3631 also had a fun jacket:


For this jacket, I made it straight by the pattern. The only exceptions:

1. I did my darts on the inside. A little less fussy that way.

2. I wasn't happy with my button holes, so I hid them in ribbon. I took lots of good pictures of this, so look for a tutorial posted during the next week. Here is the ribbon I used. I also used it as an accent throughout my wardrobe.

Here's another shot of that jacket.


McCalls 5426 Princess Seam Top

You'll have to excuse my photographic assistant in the bottom of this picture. Rex couldn't stay out of the way!

This is a McCall's "Made for You" pattern that includes different pattern pieces for AB/C/D cup sizes. I made view C and I did not have to make a FBA. I did shorten the length as usual. I followed the instructions without problems, but I wouldn't recommend this pattern to a beginner because it lacks the friendly little reminders to clip curves, press seams etc. I would also note that the construction order is strange to me, but I followed it and it worked out fine. There is a LOT of topstitching in the pattern.

BTW, I used a Kona Cotton. It will wrinkle a little, but when I first washed the piece, it came out of the dryer quite nice, so I'm hoping...

Here's another image of the shirt under my jumper.


Hot Patterns Sugar Babe Set pants! (These are seen in 2 of the images above.)

You already know I love these pants. I now have 4 pair! My only complaint--they don't have a pocket! So, I added one!

I traced my hand so I would know about how wide I needed it to be.

I drew a slanted tear drop around my hand.

I added 5/8 inch seam allowances around it.

I taped the pocket to my pattern tissue, matching the side seam lines and cut out my pants. (You should note that this took about an extra 1/2 yard and had much wasted fabric.)

I stitched a piece of ribbon along the seam allowances on the front of each pocket for support. (At this point I referred to a handy sewing guide. Look for a review of the Reader's Digest New Complete Guide to Sewing coming soon.)

I basted the pocket opening closed along the seam allowance.

I stitched the pants leg together from the hem up to the waist, following the curve of the pocket.

I clipped the corners at the pockets and finished the raw edges. I removed the basting and "bingo!" I've got pockets!

Saturday, May 10, 2008

New Mini-Wardrobe Plan

So...I've re-evaluated my plan. Here's the plan:
Brown Fabric: Simplicity 3631 View C
This jumper will be really cute alone, with a top under it, or with the jacket.


Pink Linen: Simplicity 3631 View B
This pink jacket will be cute over the jumper, or over the pants I'll make. Plus, it will go with all 4 of the bottoms I made during the Big Contest.


Khaki Linen (from stash, not pictured yet): Hot Patterns Sugar Babe Set Pants
I love these pants!

Vanilla Jersey Knit that I will have to purchase: Vogue 8451 (That I will also have to purchase)

Now to get busy!

Thursday, May 8, 2008

Re-evaluating my mini-wardrobe

I had the most successful shopping trip this weekend--and I didn't buy anything! I tried on lots of styles and quickly found the things that I liked (and that flattered me). Then, back at the hotel, I looked at my mini-wardrobe plan. Yuck!

So, now I'm looking at patterns again. These are similar to the clothes I loved in the dressing room. Now to decide on a 4-part wardrobe:


I saw this top as the bodice on a full skirted dress. Loved it!

These puffed sleeves are really cute!


I like this tank.


White shirts were everywhere!

I like this top sleeveless and banded or belted.

The shirt in the top left hand corner is much cuter when made in a great fabric. I've looked over it before because that blue is quite tragic.

Shirt dresses were everywhere!


Saturday, May 3, 2008

I'm at it again!

I love a good contest! They seem to motivate me to finish a project. So...


Here is my entry for PR's mini-wardrobe contest.


The rules only call for 4 pieces, but this 6 will combine to give me 8 more new outfits, including a Sunday set. If I need to drop 2 to finish in time, I'll drop the pink skirt and the knit top.


As with the wardrobe contest, I am shopping entirely from my stash. However, if I don't have enough khaki twill, I will be running to the store. I must have another jean skirt for the summer!

What do you think?

Thursday, May 1, 2008

Go Vote!!!

If you're reading this and you're a PR member--

Go Vote!!!!

To vote for my wardrobe, click here. To vote for my handbag, click here.

Sunday, April 27, 2008

I'm finished!!!!!!!


I am so excited!!!!! I am completely finished with my 2008 Wardrobe Contest Entry. I have finished all my reviews and you can find them on Pattern Review. Here are the stats:

11 pieces:

  • 4 tops
  • 1 jacket
  • 4 bottoms
  • 1 dress
  • 1 purse

22 total outfits (that I'd actually wear in public)

Fabric used: 26 yards

  • 26 yards out of stash
  • 0 yards bought

Patterns used: 9

  • 3 TNT
  • 4 never used from my stash
  • 2 brand new (I love 99 cent sales!)

Total spent: $14.40

Not bad for 22 new outfits!!!!

Thursday, April 24, 2008

A (successful) study in topstitching, edgestitching and presser feet

Here it is: The final piece of my 2008 PR Wardrobe Contest Collection--my denim skirt.


This was my first attempt at a denim piece (beyond the curtains in my son's bedroom). Even more importantly, it was my first attempt at a jeans pattern. I have never done a bottom with a back yoke like this, a front fly, or this much top stitching. I must say I am very proud of myself!


Here are the pattern details:


Pattern: I used McCall's 5142. I made the higher waist, contoured waistband version (D/E).

Fabric: A stretchy denim from my stash. I'm almost certain that I bought it Jo Ann's last summer. I don't love the fabric after working with it. I hope it doesn't stretch out too much as I wear it.

Thread: After much internal debate, I decided to top stitch with silver (as opposed to black which wouldn't have shown any mistakes). I actually used the same thread for the whole garment rather than switch back and forth.

What I did:

  • I started by tracing the pattern pieces that I needed onto freezer paper. The pattern piece measurements matched my measurements, so I didn't make any size alterations this time. Next time, I need to figure out how to adjust for sway back.
  • Instead of tracing the pant leg pattern piece as is, I needed to modify them. I traced the top part of the piece, down to the widest point on the outside of the leg (the hip). From there I drew straight down. On the crotch side, I found the center front, added 5/8 inch and drew a line straight down. Because the stitching lines for the crotch followed the slight angle on the crotch, I just rotated the pattern to match my new center front and traced those off.
  • I wasn't sure about the pockets, so rather than use the pattern provided, I traced the pocket off my favorite jeans and added seam allowances. The designs on the pockets were totally free-handed.
  • I did not include the small coin pocket (piece #1).
  • I put the front pockets together like instructed. (These are lined with the same green and blue dots that I made a top from for this wardrobe. Sorry, no picture of the lining.)
  • I put the fly together following the pattern instructions, except for step 14. That tells you just to stitch between the larger and small circle. Since I wasn't making a pants crotch, I actually stitched a 5/8 inch seam from the large circle to the bottom of the skirt.
  • I put the back together as instructed until step 37. Since I wasn't making a pants crotch, I just stitched the back seam.
  • I tried the skirt on before adding the waist band and wound up making much deeper seams on both sides. I probably could have cut a size or 2 smaller in the hips, especially since this is a stretchy denim.
  • The waist band went on just like the instructions.
  • I choose to leave off the belt carriers, as I never wear belts.
  • I chopped off extra length and used a blind hem to finish the skirt.

As for all the top stitching and edge stitching:I switched between 2 presser feet constantly.

To edge stitch, I used my blind hem foot and moved my needle as for to the left as possible. The blind hem foot allowed me to follow the edge or the seam as closely as possible.

To top stitch, I used my zig-zag foot. I found that if I lined my edge-stitched seam up with the edge of my presser foot, then my top-stitched seam would fall 1/4 inch away.

I am very pleased with the effect.

Tuesday, April 22, 2008

Tonsils, Purses, Wardrobes, and My Sunshine

My we've had a lot going on. The Big Girl has had quite a time. 2 weeks ago she had her Kindergarten program. (I'm trying to post a short video. I'll try again later tonight.)

She spent last week recovering from strep throat (again!) and this week is recovering from a tonsilectomy!

As for sewing: Yes, I am still working on my PR Wardrobe Contest. I have just one piece to go!!!! Of course, it would be the brand new pattern that I've never tried and that I want to modify into something else. I need to just bite the bullet and do it!!! Here are a few piecesI've finished lately:


Simplicity 4020 (how do I love this pattern!) Actually, I'm a little disappointed with this top, but I won't tell you why. Then maybe you won't notice. ;)


This top is New Look 6648. I love it!!! The skirt is from Simplicity 4036 (modified alot!)


I whipped up this purse for a sweet little friend's 6th birthday. I love the pattern because it is super simple and therefore, perfect to play with! It's Simplicity 4178. I've made it up in a cute school-girl plaid. After I finishing embellishing it, I'll post pictures and the review on PR.


And in closing:


Guarding the Pork Chops


(Check out the shoes!)

Monday, March 31, 2008

Just 4 to go!!!

Well, I have one month left in PR's Wardrobe Contest, and I think I can do. I just finished my 2nd top, so that leaves 2 tops and 2 bottoms. This is a tunic from Simplicity 3535.

The fabric is a fun green/blue/teal polka dot seersucker that I've had in my stash for a few years. The yoke, cuffs, and tie are white eyelet. This top is very light and great for this summer. It should look great with my white linen pants.

As for the pattern itself, I cut the top, used the short sleeves and added the cuff, adding about an inch to accommodate my upper arm (it is designed to be used with 3/4 sleeves and fit the forearm). The pattern is easy to sew. All that said, it is not destined to become one of my favorites. First, I really don't need many tunics like this. Second, the pattern didn't wow me. I have boxes full of others that I want to try.

Friday, March 28, 2008

White Linen Pants--Modify and Adjust, Again and Again!

Oh my goodness! These pants!

I found 2.5 yards of a beautiful white linen aging in my stash and knew I immediately that I needed white linen pants for Easter. (Keep in mind that this was Friday night and Easter was Sunday. If you know me, you aren't surprised.) I also knew just what pattern I wanted to use. So, I pulled out Simplicity 3688...

As my waist is one size and my hips another, I've never done real well at fitting pants. I decided to do it right this time. I first drew the pattern off onto white broadcloth. I increased the seam allowances to 1 inch so I'd have room to work with. I put the muslin together with very long basting stitches. The only real fitting change I needed was to move the crotch point to increase the crotch depth. I altered that on the front pattern pieces and the fit was great! It took a while, but I think it was worth it. The muslin fit beautifully.

So, with great fear and trepidation, I pulled out my white linen (and, for the sake of modesty, I pulled out some white lining also). I put the lining together first. It fit great! Then I started with the linen. The darts looked great, the linen was pressing beautifully, and I was so excited. Then...
I got a little too careless with my serger. One guess where the hole is. Needless to say, I threw those dumb pants on the floor and stomped off to bed. My sweet husband picked up the pants, hung them up, and then came to bed. Then he said the one thing could motivate me, "I don't think you can fix those."

Well, not being one to back down from a dare. I got up immediately and started thinking. I sewed and pressed and top-stitched--all while texting a friend who was at the vet with her 70 pound monster that stumbled upon a huge bag of Easter candy! What you see are the result:

Not a beautifully tailored, high-waisted, well-fitting perfect pair of white pants. Instead, they are a much more casual white linen pant with huge patch pockets. Oh, and they fit well.

I will definitely make this pattern again. Next time, I will be more careful and I won't sew while distracted. Yeah, right.

These are replacing the white eyelet skirt in my PR Wardrobe Contest storyboard. That means I've finished 5 pieces and I have 6 to go and I've sewn 14.5 yards! I might actually finish!

NOTE: Duke, the dog, is okay too!

Related Posts with Thumbnails

Shop with Me!